Decoupage Serving Tray
Hello Crafters,
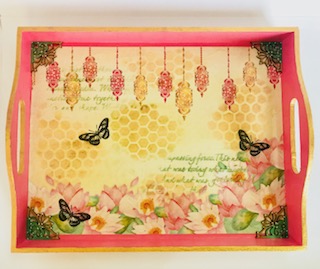
I am super excited to share another decoupage serving tray creation with you all. Have used stencil the outside and chippies on tray corners. Hope you find these DIY instructions helpful.

- First take the MDF base which is to be decorated. Apply white gesso all over the surface and let it dry. Now, make it smooth by rubbing the surface with fine quality sand paper. Clean the surface with a damp cloth. Apply a good coordinating color (chalk paints) or a contrast color(chalk paint) basis your preference to the base and let it dry.
- Now your base is ready to be decoupaged. Take the decoupage paper measure and cut according to the required size for the tray, and for the coasters cut it little larger than the size.
- Take a sponge applicator and glue the surface. Stick the paper by rubbing with your fingers and thumb on the glued area. Apply very little glue at a time to cover small areas so that you get a fine finish and good results. Take care that no air remains beneath the paper.
- Let the tray dry properly and then apply two coats of glue over the paper to give a good finish.Take care to dry every time you apply the glue.
- I also did the stenciling on it edges for that i have used the mixture of gesso and acrylic color. I applied it with the help of stencil brush.
- Finally for giving some highlight I have applied golden acrylic color on the edges of the tray using small sponge dauber.
- To make it water proof i have applied resin in the center area and varnish on the sides to give it a shiny look and a good finish.
It is ready to be used now. Good luck for your decoupaged serving tray.
Leave your lovely comments below if you loved this work. Also, feel free to comment with any questions.


Comments
Post a Comment